An easy craft, intended for toddlers and pre-schoolers. A parent or carer will need to do the cutting out and fastenening the pieces together.
You will need:
Card
Scissors
PVA glue
Tissue paper
Paper fasteners/brads
Wiggley eyes
Cut out 3 strips of card of approximately 3cm x 13cm. I just used a cereal box. Curve the ends of the strips.
Cut your tissue paper into small pieces. Cover the card strips with PVA glue and let your child stick on the tissue paper. If your child prefers, they could paint or colour the snake in with crayons or pen instead.
When the glue has dried cut the excess tissue paper from around the edges.
Fasten the snake together using 2 paper fasteneners or brads. To finish, give him googley eyes.
Tuesday 21 September 2010
Friday 17 September 2010
Learning to knit
I am still very much a knitting novice, but I thought it would be fun to share some "how to knit" links. Basic knitting is something I learnt to do as a kid -nothing fancy, just scarves - but forgot about over the years once I stopped doing it.
When I had my second son I got the sudden urge to start knitting, (must have been the pregnancy hormones!), so I had to teach myself how to do it again. I've uploaded a picture of my son's baby blanket below. I used a very basic stitch to make little squares, sewed them all together and then stitched around the edge to finish it off. It took most of my pregnancy to complete and the finished product was quite small, but it was big enough to stick over his swaddling blanket on colder nights and I was pleased with my handiwork.
Here are the knitting links. I think the first one is the website I used the most when teaching myself to knit, but can't remember exactly because it was 2007:
Learn 2 Knit
Craft Yarn Council
YouTube is a great resource if you want to look for videos to help you understand the instructions. CyberSeams and eHow both provide good video tutorials on learning to knit.
Great simple craft projects for kids to do with knitting are scarves or blankets. They can graduate onto more complicated projects such as bags and hats later on.
Friday 3 September 2010
How to make a TARDIS out of junk!
The kids are back at school! Here is one of the crafty things I did with eldest monkey (age 5) while he was off:
He wanted to make a TARDIS for his Matt Smith and David Tennant figures and this is what he came up with.
The main part of the TARDIS is a tissue box, with doors constructed from scraps of card and sellotaped on. The light is a cork covered in paper which I superglued on the top for him. He painted it and did the windows, etc, himself.
Not a bad way to spend an afternoon during our wash-out summer!
Wednesday 7 July 2010
Salt Dough Door Plaque
Getting a ready made children's door plaque or buying wooden letters to spell out a child's name can work out expensive. So here is a craft project for a child to make their own - they will love their new door sign because it is all their own work.
Adapt this project to suit the resources you have available. For instance, if you don't have alphabet cookie cutters then you can paint the letters on. Or if you are spelling out a long name you may want to just use alphabet cookie cutters then decorate the letters in different colours and patterns. If you are feeling uninspired look at commerically available ones to get the ideas flowing!
You will need:
2 Cups plain white flour
Half a cup of salt
1 Cup hot water
Cookie cutters
Paint
Crafty embellishment (optional)
Varnish/PVA glue (optional)
Adhesive sticky pad squares
For this kid's craft project, you will need to make microwaveable salt dough. Combine the flour and salt in a large bowl and gradually add the hot water. Stir till it forms a stiff dough.The quantities I give in the recipe on this site make 3 to 4 letters.
Select the cookie cutter (or cutters) you want to use. If you want to do what I've done in this tutorial and cut the letter from the centre of the shape it will need to be fairly large.
Roll the dough out to a depth of about 1cm. Cut out a shape for every letter of the name or word you are spelling out.
Bake each finished shape in the microwave for approximately 2 minutes on each side (4 minutes in total).
Paint each letter in whatever colours or designs you like. The letters on the left also have sequins on (in the centres of the flower) and are covered in glitter glue.
To make the letters more long lasting and to to give them a sheen cover them in varnish or PVA glue (it will dry clear) once the paint is dry. This step is optional.
If you want to fix them to a door, you will need self adhesive foam squares. These are generally used in card making or scrapbooking so you can find them anywhere that sells art and craft supplies. Large ones are preferrable, but the 5mm size will fix the letters securely to the door too. If the letters you have made are small and light then Blu Tack my suffice for sticking them onto a door, (use several small pieces on the back of each letter).
Thursday 17 June 2010
How to Make an Elephant Mask
This is a cheap and simple craft idea for young children.
You will need:
Four paper plates
Scissors
PVA glue/sellotape/stapler
Paint
You will need four paper plates to make your elephant.
Make eye holes in one of the paper plates. Cut one of the other plates in half and then trim off the edge - this will make the trunk.
Glue or tape the pieces of the mask together. Alternatively, fix it together with a stapler.
Paint or colour in the mask.
Your elephant mask is complete!
Thursday 10 June 2010
Butterfly Stained Glass Window
Below are instructions for making a butterfly stained glass window from tissue paper. If you don't fancy doing your own design I've included a template at the end of this post. You will need to download it to your computer and resize it before printing it off.
Other easy designs you could try are flowers, fish and dragonflies.
You will need:
Black paper
Tissue paper or irridescent film (assorted colours)
Scissors
PVA glue
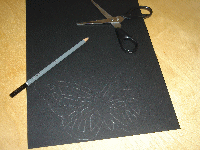
Draw your design onto black paper. If you don't have black paper, other colours should look fine too or you could even cut the design out of a cereal box and paint it black.
Use scissors to cut out the butterfly and then enough small squares of tissue paper (or irridescent film) to cover the entire design. Cover the butterfly with a thin layer of PVA glue.
Stick on the tissue paper squares, ensuring there are no gaps left. Leave it to dry.
Trim any tissue paper which may be overlapping the edge of the butterfly and the stained glass window is finished! Stick it to the window with a little bit of blue tack.
Butterfly stained glass window template (right-click and save to computer before printing):
Friday 4 June 2010
How to Make a Pom Pom Sheep
Pom poms are really easy to make. A sheep is used in this tutorial, but pom poms can be used to make a variety of creatures, for instance an Easter chick.
You will need:
Cardboard
Scissors
Wool
Black fun foam
Needle
Black thread
Wiggley eyes
Glue
Draw two circles, around 15cm in diameter, on a piece of card (a cereal box is ideal for this). A saucer may work well as a template. Then draw a smaller circle of around 6cm in diameter in the centre of them. Cut them out so that you have 2 donut shapes.
Put the two pieces of card together then tie the end of your wool around them. Pass the ball of wool through the centre of the card and start winding it around. If the ball of wall is too big to fit through the centre hole, cut off lengths of around 2 metres to work with instead.
Keep winding the wool around your cardboard template until it is completely covered. The more layers of wool, the thicker and fuller the finished pom pom will be.
Carefully cut around the edge of the pom pom.
When this is done, slide a length of wool between the two pieces of card and tie it really tightly around the centre of the pom pom, bringing the pieces of wool together and securing it.
Cut a head and four legs from a piece of black fun foam.
Sew these on by passing the needle through the centre of the pom pom. Glue two googley eyes onto the head to cover the stitch from where it has been sewn onto the pom pom.
The sheep is complete!
Subscribe to:
Posts (Atom)